středa 26. června 2013

Grill party

Summer parties are in the full swing, so it was time to document some of the lovely things we were having :)


GRILL PARTY


For the backround I used white textured cardstock, and I spayed it with Mr. Huey´s Manila spray. Title is made out fo thickers from Amy Tangerine.


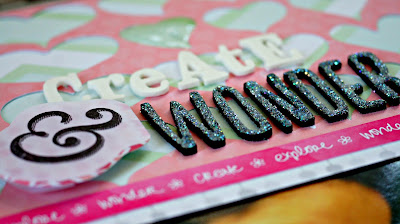
For the PARTY title I used white thickers with Glossy Accents on top - and sprinkled it with some glitter.  by the way, I never thought I will be a glitter girl, but it happened and I´m loving it!


Under the first photo I tucked these fantatci cork embelishments from Little Yellow Bicycle and I also used some vellum stickers from Studio Calico. 


For the second photo I used a "real life" embeslishment - I saved these bottle caps from some special belgium beers and flattened them with little hammer. 


Have a lovely day and thanks for reading!
Anna

čtvrtek 20. června 2013

Sketch inspiration

Once in a couple months I have to make a sketch for our Papero amo blog. Although I love using one photo on the layout, I decided it would be more useful for other girls to make a two-photo sketch.


I created a simple page with photos of my cousins´ winter wedding.


The page is created mostly with Amy Tangerine Sketchbook collection papers.
I LOVE the colors!


What I enjoyed most while creativng this layout was making of the title (princess in czech language) - it is made out of  Thickers from Amy Tangerine. I layed them out on the scrap piece of paper and then spayed it with orange Mr. Huey´s. Then I lifted all the letters and reposioned them just a touch and pressed them down again. This created sort of a white shadow.


I cut out feathers from the coloured tissue paper, and one from basic white cardstock using a template from my previous DIY. The white feather I wrapped in turqoise Garn und Mehr twine.


The rest of the title is made out of various stiker aplhabets 
and Echo park Sweet girl paper pad.


As always, I HAD to use couple of enamel dots in various colours,
 and the journaling was made on my lovely old typewriter.

Have a lovely day and thanks for dropping by :)
Anna


úterý 18. června 2013

Scrap card

How much scraps of different cardstock and papers you have lying around? If you are like me, than your answer is probably - too many! Some times I just have to MAKE myself to take that box out and create something just from scraps. 


This time I dug out only grey paper scraps and made this simple card with vellum feathers.


Make this your monthly challege and try to use your scraps every once in while - you will be surprised, what kind of treasures are there waiting for you :)

Have a lovely day,Anna


sobota 15. června 2013

Froassage card

Couple weeks ago I made this Clean and Simple card using the froassage technique. 


This technique is about smashing piece of paper into a ball, and then folding it out again. 
After that you apply water on the paper to make it soft, and then you apply distress ink, especially in the cracks on the paper. It creates nice distress and vintage look of the paper. You let the whole thing dry and then use on the project.

Have a lovely day :)
Anna

Summer day trip

Tovačov, Czech republic 
one sunny afternoon


Have a lovely day :)
Anna

středa 12. června 2013

Grey inspiration

I so wanted to try this triangle background - first I had to make a template, which was cut into the separate pieces. Those I layed out on the actual papers I was using, and cut them out again. It was a lot of work, but I think it was well worth it!

CUTE. But devilish

I cut out some arrows, used little bit of washi tape and stamped couple of "Documented" words on the layout. 


Under this gorgeous Silhouette cut-out I used the white-green baker´s twine from Garn und Mehr. And then my favourite vellum, mini-brads and couple splashes of ink and I was all done :)


Have a lovely day :)
Anna

úterý 11. června 2013

Cloud backround technique


As I was browsing PINTEREST the other day, I ran into awesome layout with cloud bakround made with distress inks, and I decided I need to try it myself!

YOU WILL NEED
white cardstock
distress inks
ink aplicator
pencil
scissors


1. Draw some could shapes on a scrap piece of paper.  
Best would be a piece of 12" cardstock, so you can cover the whole lenght at once.


2. Cut out the clouds...


3.Put the template down on the white page.


4. Aplly ink over the edges of the template.


5. Now shift the template upwards and do it all over again with different colour. I used 5 colours overall, but I think even two could be enough. You should try to move the template around a little bit, turn it over even. The clouds will look more natural. 


6. And we are finished!


I used my cloud backroud paper for a layout with our puppy - as always used tons of Amy Tangerine and Studio Calico products :)


Thanks for stopping by!
Anna


sobota 8. června 2013

Challenge - This is me

For our challenge at Papero amo called "This is me" I had to make a layout using my photo and things that describe my scrapbooking style the most. 


I made page in "my colours" - pink, blue and grey. I used my all time favourite thickers from Amy Tangerine and her papers from Sketchbook collection. I had to use my most favourite material in the world - vellum, and the new love - enamel dots. 


I embossed the big chipboard heart with pink and white embossing powder with golden glitters, and then wrapped it in golden-white baker´s twine from Garn und Mehr


I made the backgroud little bit messy with Gesso, that I also used for sprinkeling the page. AND I pained with it on the black thickers - that created a wonderful effect, because I painted only the top part of the letters and left the sides in the original black. It looks little bit like a shadow in the end. 


I cut the arrows from vellum, which I also used for banners underneath the photo. 


Have a lovely day :)
Anna

pátek 7. června 2013

5 essentials

Here are 5 essential things I can´t live without this month:

1.  Scrapperin papers from Belle pastel collection
2. thickers
3. glitr
4. vellum stickers


Project made with 5 essentials

Create & Wonder

I used a lot of glitter - on the embelishments and on the title.
 I always use Glossy Accents to glue them down.


I can´t imagine my layout without a piece of vellum anymore - here in a form of sticker.


And I definitely can´t live without THICKERS! they fit every page, have lots of great fonts and you can dress them up with paint, inks, spays or glitter :)


Have a lovely day,
Anna

středa 5. června 2013

DIY fabric feathers

In this months DIY I will show you how to make easy fabric feathers. I used them for dressing up a gift box, but you can use them on literally everything.


YOU WILL NEED

  • feather template (download here)
  • fabric scraps
  • scissors
  • glue
  • pencil
  • twine

TUTORIAL

Download the feather template and print it out - I recommend heavier cardstock. Cut out the feathers.  

1. Put the template down on a piece of fabric (on the obverse side of the fabirc, so you wouldn´t have the pencil marks on the reverse side)


2. Draw around the shape of the feather.


3. Now turn the template and do it again.


4. Now you should have two mirrored feathers. 


5. Cut the both out.


6. This is how it will look like.


7. Turn the feathers to their observe side and apply glue.


8. Take a piece of twine and lay it down in the middle of the feather. 
The lower end of the twine should be longer. 


9. Put the other half of the feather down and press firmly, so you can see the line of the twine. Cut the piece of twine that´s coming out the upper end. 


10 And we are done - try out all three sizes :)


PROJECT WITH FEATHERS